I'd just like to start by saying
Red Mahogany is my new favorite color.
That's right, this once red-loving gal has officially made the switch. Kind of. You see, I pretty much decided you're allowed to have different varieties of favorite colors. As in, my favorite color is bold, bright, in-your-face red. But, my favorite furniture stain color is officially red mahogany. And if you're thinking it's only my favorite color because of how fantastic the outcome, you're totally right!
See, I have this problem. (Who am I kidding? Every woman with a pinterest has this problem) I get on my Pinterest and pin all day long. And then I never follow through. I have so many DIY projects that I have never even really thought about long enough to figure out how to do. But, I'm not exactly a plan ahead kind of girl. Which must be why this DIY project worked out so well.
Here's a step by step story of my super fantastic, very first time ever, DIY upcycle of an ugly old dresser.
1. First, I'd like to apologize to anyone who likes light wood. I think it looks cheap, tacky, gross, etc. Also, sorry for the junky iPhone pics. Swear I'll get a memory card soon so my awfully expensive camera can be put to some actual use.
So, here I am driving over to a family's house (For those of you who need to know, I'm dog/house-sitting while they're away. It's a mutual arrangement we have. I love it). So, here I am driving down their street when I see this yard that is full of gross, old furniture down by the street. (Also, I'd like to point out how annoyed I was that this stuff was out by the street days before trash-day). I was driving, and I found this junky old dresser that was banged up and pretty ugly. But, I am a hopeless romantic for a lost cause. Besides, it had some potential with the carvings in the front. So, I had my super strong, super handsome, super wonderful, fantastic, awesome husband grab it and throw it in the back of my moms truck.
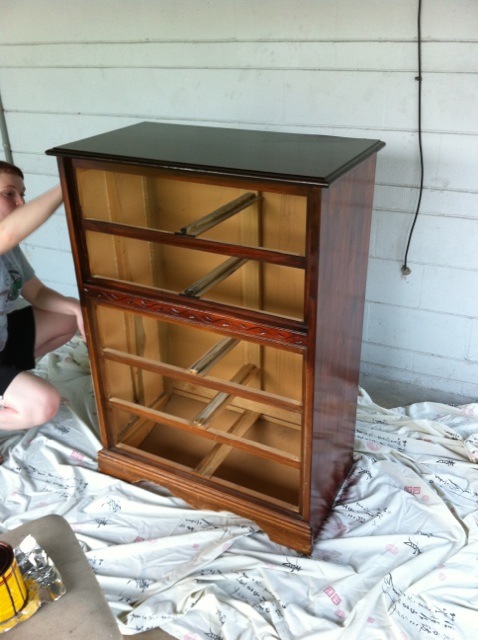
Meet my dresser, pre-makeover.


See? Nice carvings, right?
So these people I guess got some new furniture and were like "We should just chuck this nasty old stuff" which works for me, because I am a poor newlywed and free furniture is great.
So I found it, and I decided to dive headfirst into a pinterest DIY, staining a dresser.
Here's a step by step of how we did it, pretty much.
1. We took out all of the drawers and sanded the entire thing down. (Also, Matt got this super handy sander that's like the cutest little thing. It's a whole other world inside a home improvement store...)

2. I assume that you probably are supposed to put some pre-stain stuff, or paint & stain remover over the wood. Maybe some wood conditioner to get it nice and perfect before staining. But, newlywed budget, I just skipped that step.
To be completely honest, I did buy some of the paint & stain remover. However, I didn't even open it.
3. After sanding, I pretty much just...opened the stain and got straight to it? Matt bought this super nifty sheep's-fur applicator thing, which I loved loved loved. And I just started spreading the goodness all of the dresser. First the top, then the sides, then the front, then the drawers. Totally covered all of them in stain, only one coat.
You should know a little bit goes a very long way with Stain.
Also, excuse the nasty blonde in my hair. I need to get it done, bad. Also, I look terrible. Don't judge me.


I covered the carport concrete with a super ugly sheet that we had lying around so that it didn't stain my concrete and leave big ugly marks. After staining, I left it to dry. But in this NASTY NASTY NASTY humidity, it took like 2 days, and it was still sticky. So I had Matt just bring it inside to dry in the AC.

4. After that, we just added some really nice coppery-gold handles to the preexisting holes for lovely handles and knobs, or the terminology of your choice. Also, I had to fill in some holes from extra preexisting handles (the handles they had were really weirdly sized, and there were no handles that matched in size). I probably should have used wood filler, but I really like the roughed up look for furniture. So, I just used my spackle. Yes, I know, that is dumb and not ideal. But I love spackle and will use it for anything. It's like WD-40. You can use it for so much. I just stained over the spackle. It's a little darker, but the new handles mostly cover those holes anyways. So I think it still looks pretty decent!
And, voila.
Sanded, stained, and handles applied.
One brand-spankin-new dresser.
All from someones ugly old leftovers.
And so I apply my new motto.
Your trash could be my treasure.
Who's ready for an after picture, after all that rambling??? You are? You are?? You say you are? Okay. Let me show you!

BAM. I mean, seriously, BAM. Is that not so gorgeous?
Also, did I mention, the red mahogany color I stained matches PERFECTLY for the big dresser I got (for 30$ off Craigslist - BOOYAH) Seriously, this was just too good to be true. First DIY upcycle - SUCCESS.

Just look at that. Sigh. Okay, thanks for reading the ramblings!
Hugs, love, sparkles and glitter!
Lynz
No comments:
Post a Comment